Using ColorTween in Flutter app
Posted on August 07, 2019 in Flutter
Target Audience: Beginner
Recipe: Implement animation using ColorTween for Android, iOS and WebApp.
Focus Widget: ColorTween
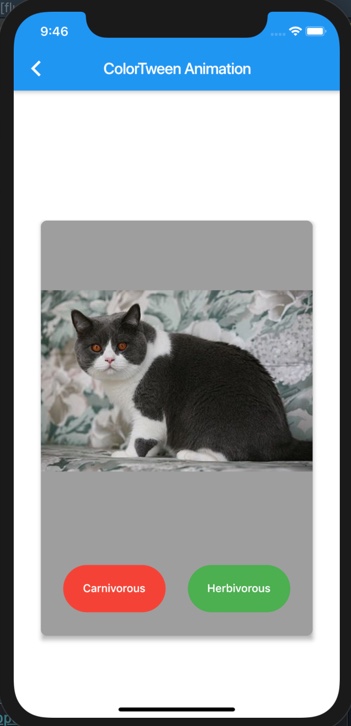
Goal: Animating from one color to another for a quiz card's background based on the correct answer. We'll implement a card with picture of an animal in it, along with two choices to select from: 'Carnivorous' or 'Herbivorous'. When correct option is picked, background color of card will transition from grey to blue color in order to indicate correct selection otherwise background stays grey or turns grey from blue.
Checkout the companion video tutorial:
ColorTween for Native platforms (Android & iOS)
Step #1. Data (items.dart)
I'll be creating a little data structure CardItem to keep track of model for UI card.
It has four parts to represent a Quiz card: title, description, image and animalType.
title and description are not used to render on Card UI. image has path to image in assets directory in Android Studio.
class CardItem {
  final String title;
  final String description;
  final String image;
  final String animalType;

  CardItem(this.title, this.description, this.image, this.animalType);

  CardItem.fromMap(Map<String, dynamic> data)
      : title = data["title"],
        description = data["description"],
        image = data["image"],
        animalType = data['animalType'];

  static List<CardItem> fromData(List<dynamic> data) {
    return data.map((item) => CardItem.fromMap(item)).toList();
  }
}
In the class above, you might have noticed fromMap(...) and fromData(...) methods, which are used to parse json data (intended to be fetched over network). In this recipe, I've hard-wired the sample json data as below:
[
   {
      "title":"cat",
      "description":"Cat is carnivorous animal.",
      "image":"assets/images/carnivorous_cat.jpg",
      "animalType":"carnivorous"
   },
   {
     ...
   },
   ...
]
Parsing json string above is done as below:
final List<CardItem> cardItems =
    CardItem.fromData(json.decode(Samples.jsonData()));
Now, importing items.dart in any class/file, will give access to cardItems. An item in list can be accessed as cardItems[0], cardItems[1] and so on.
Step #2. User Interface (color_tween.dart)
We'll be implementing following quiz like card to demonstrate transitioning from grey color to blue and vice versa.
UI's body has main three parts:
Positioned Widget: To display card.- Image: image of the animal to quiz on.
- Row of FlatButton widgets: Two FlatButton to present choice of
Carnivorousin red andHerbivorousin green color.
Step #2-a. Quiz Card UI anatomy:
@override
Widget build(BuildContext context) {
  //we need screenSize to render card relative to the given device's screen size
  Size screenSize = MediaQuery.of(context).size;

  //Fetching image from `assets` folder
  DecorationImage decorationImage = DecorationImage(
      image: AssetImage(cardItems[0].image), fit: BoxFit.fitWidth);

  return Scaffold(
    appBar: AppBar(...),
    body: Container(
      ...

      Positioned(
        child: Card(
          ...
          //parent container to host the quiz card
          child: Container(
            alignment: Alignment.center,
            width: screenSize.width / 1.2,
            height: screenSize.height / 1.7,
            ...,

            //Contents of card: Image and FlatButtons for quiz options
            child: Column(
              children: <Widget>[

                //Image of quiz animal
                Container(
                  //Note: width of image is same as parent
                  width: screenSize.width / 1.2,

                  //Note: Image's height is smaller than parent, so that parent can contain image inside it.
                  height: screenSize.height / 2.2,

                  //Rendering image
                  decoration: BoxDecoration(
                      borderRadius: BorderRadius.only(
                        topLeft: Radius.circular(8.0),
                        topRight: Radius.circular(8.0),
                      ),
                      image: decorationImage),
                ),
                //Widget to contain FlatButtons for quiz options
                Container(
                  //Width remains same as of parent, however height needs to be calculated to position in under image.
                  width: screenSize.width / 1.2,
                  height:
                      screenSize.height / 1.7 - screenSize.height / 2.2,

                  child: Row(
                    ...
                    children: <Widget>[
                      FlatButton(
                        ..
                        //Animation trigger: This is where animation will be triggered
                        onPressed: () => {},
                        child: Container(
                          ..
                          child: Text("Carnivorous"),
                        ),
                      ),
                      FlatButton(
                        ..
                        //Animation trigger: This is where animation will be triggered
                        onPressed: () => {},
                        child: Container(
                          ..
                          child: Text("Herbivorous"),
                        ),
                      ),
                    ],
                  ),
                )
              ],
            ),
          ),
        ),

      ),
    ),
  );
}
Step #3: Implementing ColorTween Animation
Finally, time to implement transition animation from grey to blue color using ColorTween class. There are couple of steps that we would need to achieve that.
- Using
SingleTickerProviderStateMixinwithStatefulparent'sState:
class ColorTweenAnimationDemo extends StatefulWidget {
  @override
  _ColorTweenAnimationDemoState createState() =>
      new _ColorTweenAnimationDemoState();
}

class _ColorTweenAnimationDemoState extends State<ColorTweenAnimationDemo>
    with SingleTickerProviderStateMixin {
      ...
}
- Initializing
AnimationControllerandAnimationinsideinitState(). AnimationController is intended to control the state of the animation like starting usingforward(), revering usingreverse()and stopping.Animation<Color>will be used to define value change between one color to another, which is from grey to blue in our case.ColorTweenclass is exactly what it saysbetween colors. It begins with beginning color 'grey' and ends withblue. This transition behavior is attached with AnimationController_controllerto manage the animation. A listener can be added to listen to state changes from where it starts until it stops.
...

AnimationController _controller;
Animation<Color> animation;

@override
void initState() {
  super.initState();

  _controller = AnimationController(
    duration: const Duration(milliseconds: 2000),
    vsync: this,
  );

  animation = ColorTween(
    begin: Colors.grey,
    end: Colors.blue,
  ).animate(_controller)
    ..addListener(() {
      setState(() {});
    });
}
- Animating Card's background: Add
animation.valueascolorattribute forBoxDecoration(...)in parent's card widget like below:
...
//parent container to host the quiz card
child: Container(
                  ...
                  width: screenSize.width / 1.2,
                  height: screenSize.height / 1.7,
                  decoration: BoxDecoration(
                    color: animation.value,
                    borderRadius: BorderRadius.circular(8.0),
                  ),
                  ...
                )
...
- Triggering animation: We want our color change animation starts when we click the right answer which is
Carnivorousin out case. When we pressFlatButtonat left, background color changes from grey to blue. WhenFlatButtonat right,Herbivorousis clicked,reverse()animation is called, which changes color from blue to back to grey. Let's see how animation is started from FlatButton'sonPressed()methods:
children: <Widget>[
  FlatButton(
    ..
    //Animation trigger: This is where animation will be triggered, responsible to change color from grey to blue.
    onPressed: () => {_controller.forward()},
    child: Container(
      ..
      child: Text("Carnivorous"),
    ),
  ),
  FlatButton(
    ..
    //Animation trigger: This is where the reverse animation will be triggered, responsible to change color back to grey.
    onPressed: () => {_controller.reverse()},
    child: Container(
      ..
      child: Text("Herbivorous"),
    ),
  ),
],
- Disposing AnimationController: Don't forget to dispose AnimationController.
@override
dispose() {
  _controller?.dispose();
  super.dispose();
}
What about Flutter Web ?
[UPDATE Sept 23rd, 2019] Since release of Flutter 1.9, there's no need of maintaining separate code bases for native and web Flutter implementations. Please refer to my article about migrating to Flutter 1.9 for details.
Note: As of today Aug 7th, 2019- There's an issue in running Flutter Web App after upgrading to the latest version of Flutter SDK.
Let's achieve the same animations on Web platform. Please refer to my this article, if you're new to Flutter-Web / Hummingbird and need help with setting up web project.
In short, we would need to create an another branch say animations-web to host all web related code since web libraries are not pushed to same repository as of native platform. You'll need to fetch libraries directly from their Github repo.
- It means imports in native vs web platform are different. Make sure that all files have correct web intended imports.
Native:
import 'package:flutter/material.dart';

Web:
import 'package:flutter_web/material.dart';
-
pubspec.yaml: I keep a backup for native and webpubspec.yamlconfig aspubspec.yaml.webandpubspec.yaml.nativein both branches. Copy correct file's content into currentpubspec.yaml. -
Building project in web branch
animations-web. Make sure that you're instablechannel:
flutter channel stable

flutter clean

flutter pub upgrade

flutter pub get

flutter packages pub global run webdev serve
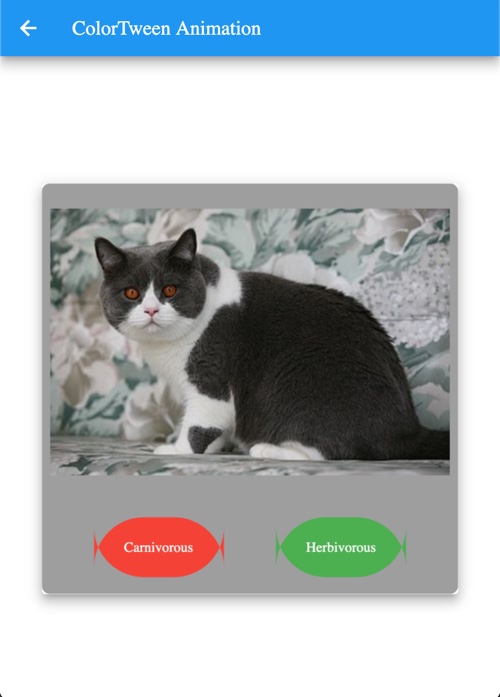
Note: You may notice that image doesn't render using AssetImage. I use Image.network() to render images in web version like below:
Container(
  width: screenSize.width / 1.2,
  height: screenSize.height / 2.2,
  child: Image.network(cardItems[0].image),
),
Here's screenshot of the web version:
Source code repo:
[UPDATE] Native and Web codebases are merged into one codebase since release of Flutter 1.9.
- Source code is available here
References:
- ColorTween
- AnimationController
- Animation
- SingleTickerProviderStateMixin
- Positioned Widget
- FlatButton
Happy cooking with Flutter :)
Liked the article ? Couldn't find a topic of your interest ? Please leave comments or email me about topics you would like me to write ! BTW I love cupcakes and coffee both :)
Follow me at twitter