Flutter FactsBot using DialogFlow
Posted on August 20, 2019 in Flutter
Background
In this article, we'll learn to integrate DialogFlow in a Flutter app for enriched conversational experience. I'll use the sample app that we built earlier in my previous article Designing Cross platform Flutter prototype for Landing Page (Web-Hummingbird, Android, iOS). We'll be integrating DialogFlow conversational API in native Flutter App.
You can refer to previous articles here:
- Designing Cross platform Flutter prototype for Landing Page
- Making Cross-platform Flutter Landing Page Responsive
- Using Flutter Themes for Cross-platform Landing Page (Web-Hummingbird, Android, iOS)
Checkout the companion video:
Introduction
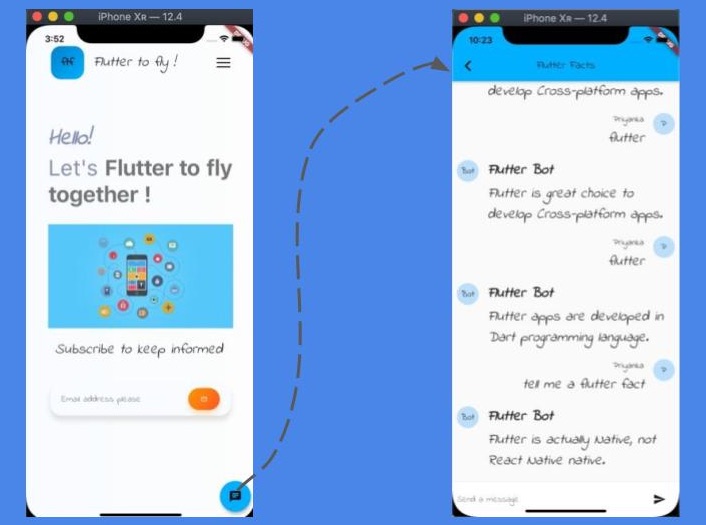
In this article, I'll show you how we can integrate DialogFlow in a Flutter app for enriched conversational experience. We'll keep it to a fun app for demonstration purposes. We'll add a chat icon on our landing page. Clicking on this chat icon, will take user to a chat like screen. Whenever user type sentence or word consisting "Flutter" in it, our "Flutter Facts Bot" will present user a fact about Flutter :) Simple !
To adapt our existing landing page app to this new conversational style, we'll be taking following steps:
- Setting up DialogFlow
- App's Integration with DialogFlow
- Adding Chat like Icon at Landing Page
- Developing "FlutterFactsDialogFlow" interface
Setting up DialogFlow
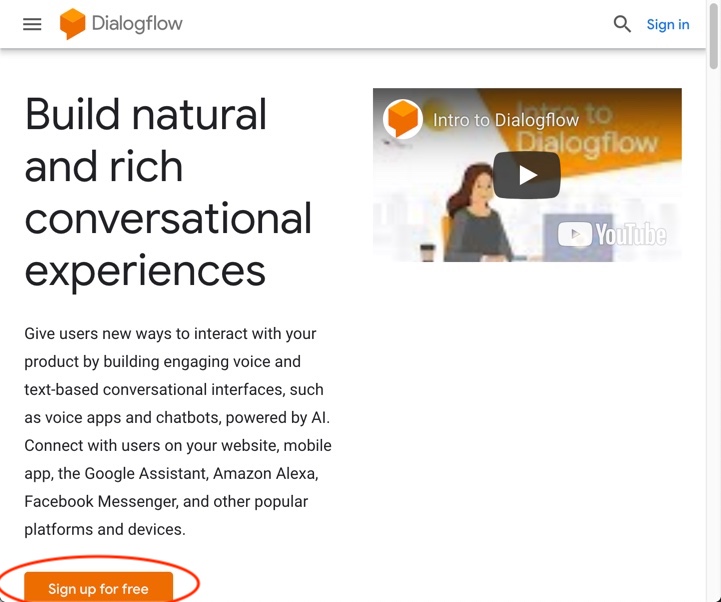
- Create an account at DialogFlow. It's free to create account.
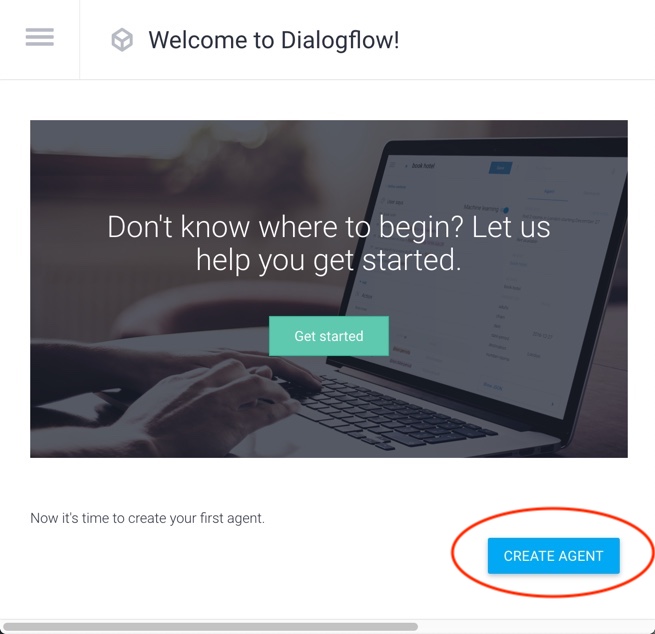
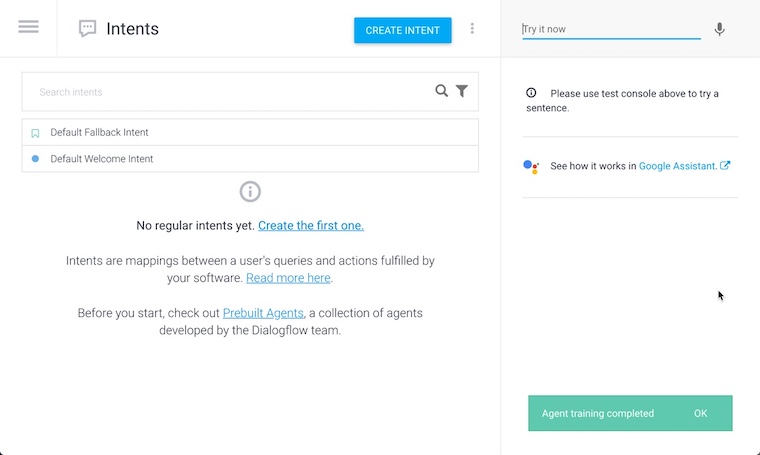
- Create agent by clicking on "Create Agent" button as shown in image below:
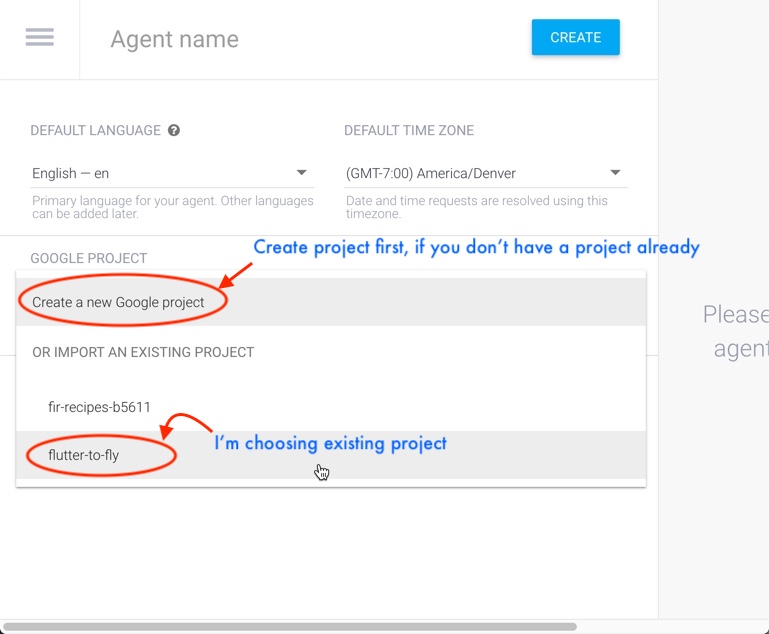
- Assign a google cloud project. Navigate to Google Cloud Console to create a new project, if you don't have a project yet. I'll choosing my existing google cloud project named - "flutter-to-fly".
- Create/Choose Intent. I'll be using default welcome intent for this tutorial. This is the very first intent presented to user at the beginning of conversation.
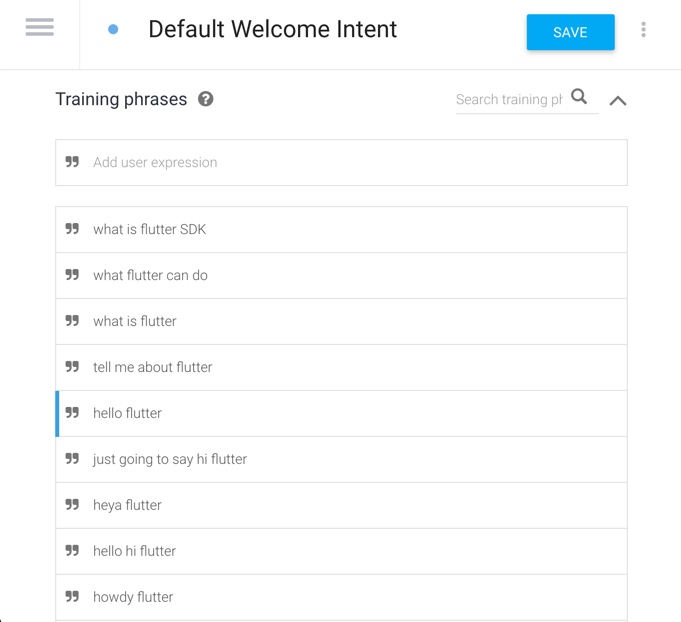
- Train intent. Add training phrases at this step. Training phrases will include words or sentence(s) which you think user could use to invoke conversation. I'm using word "flutter" in various combinations. As far as user has "flutter" keyword in their sentence, they'll be presented a fact about flutter. Click "Save" when you're done adding all possible keywords/phrases. It'll start agent training.
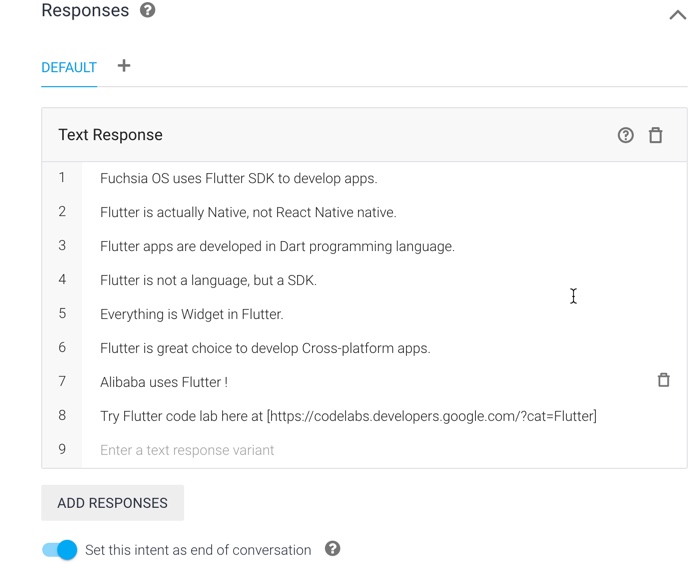
- Add Responses. I'll be adding simple text responses for this tutorial. Response text is the output for the phrases tried out by user. If a match is found for user input text, one of the text response will be returned to user. In our case, as far as user says "flutter" in its query, a Flutter fact will be returned.
- You can try out responses at the right panel either by typing or speaking out phrases in order to test the fulfillment.
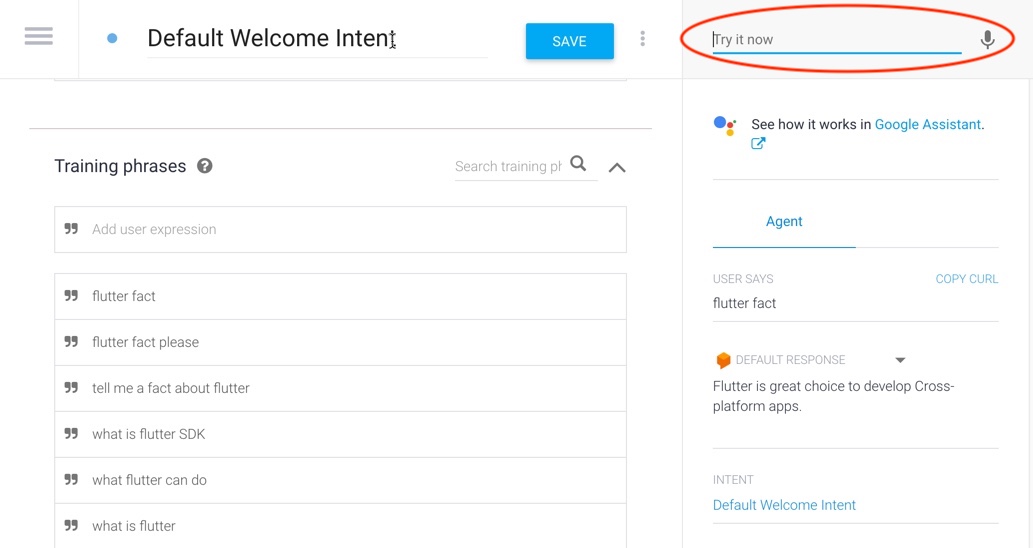
DialogFlow agent is trained and ready to return text responses for default intent !
App's Integration with DialogFlow
Now, we want to integrate our newly trained DialogFlow intent into "Flutter Facts" feature of our app.
-
Head over to Google Cloud Console.
-
Choose Google Cloud project.
- Select "API & Services"
- Click on credentials.
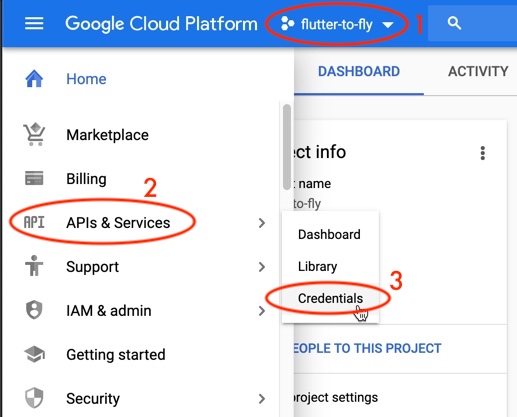
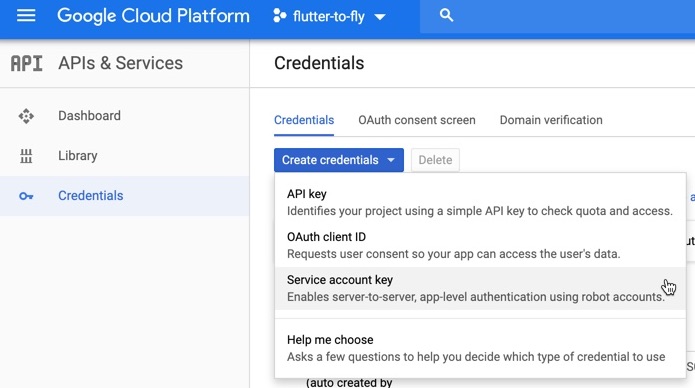
- Click on "Create credentials" drop down menu, and choose "Service account key" option.
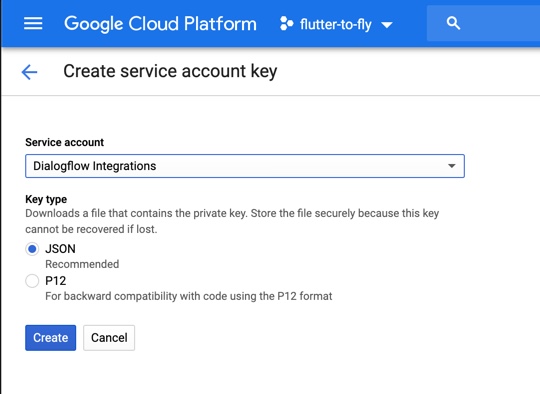
- Select "DialogFlow integrations" option in Service account drop-down. Choose recommended "JSON" format for key type.
- Download you private key to your machine. Keep this safe somewhere private to you. DO NOT commit this key into version control system.
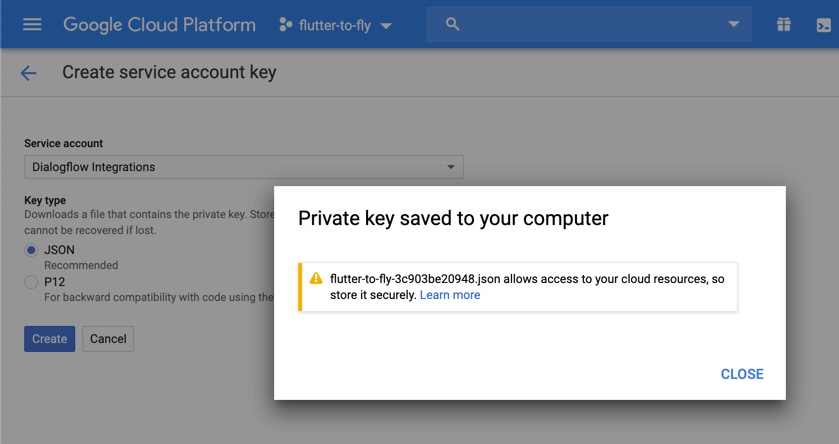
Note: Save your credentials file at a safe location. DO NOT check-in this file in version control system like Github, BitBucket etc.
- Copy credentials file
flutter-to-fly-creds.jsonin toassetsdirectory. I prefer to make symlink for this file insideassetsfolder to save me from accidentally checking it in Github.
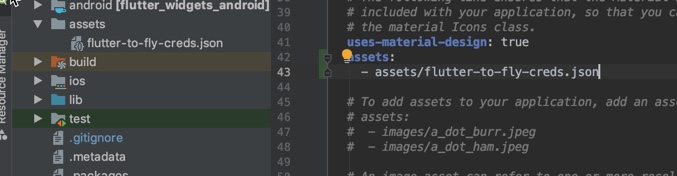
pubspec.yamldependencies for DialogFlow plug-in:
dependencies:
  flutter_dialogflow: ^0.1.2
At this point your Flutter app is ready to send requests to DialogFlow APIs.
Adding Chat like Icon at Landing Page
Let's add a chat like icon to invoke conversation with DialogFlow. Clicking on this chat icon will open a new page with an input box for user to enter their query. For every query entered by user will fetch a flutter fact from DialogFlow.
In this section, I'll be adding a chat icon in the bottomRight corner of the landing page like below:
![]()
I'll be creating a file say widgets_lib.dart to keep track of my all reusable widgets. The widget factBot is a FloatingActionButton to initiate FlutterFacts user interface. You would notice that onPressed: property sends a message to router to open FlutterFacts UI. FACTS_DIALOGFLOW string is like a key-value mapping between page identifier and target page that should launch as result.
Widget factBot(BuildContext context) {
  return Container(
    alignment: Alignment.bottomRight,
      child: FloatingActionButton(
        materialTapTargetSize: MaterialTapTargetSize.padded,
        child: Center(
          child: Icon(Icons.chat),
        ),
        elevation: 4.0,
        backgroundColor: MyColors.blue1,
        onPressed: () => Navigator.pushNamed(context, FACTS_DIALOGFLOW),
      )
  );
}
Navigating in the app:
I'll be using page routing for navigating from one page to another in this Flutter app.
Let's quickly review router.dart. This file defines a string to represent each page, and make use of RouteSettings attribute to open a qualifying target page. When routeSettings.name matches FACTS_DIALOGFLOW value, FlutterFactsDialogFlow() page will open.
const String FACTS_DIALOGFLOW = "FACTS_DIALOGFLOW";

Route<dynamic> generateRoute(RouteSettings routeSettings) {
  switch(routeSettings.name) {
    case '/':
      return MaterialPageRoute(builder: (context) => MyHomePage());
      break;
    case FACTS_DIALOGFLOW:
      return MaterialPageRoute(builder: (context) => FlutterFactsDialogFlow());

  }
}
Let's see what changes we need to make in main.dart to support this routing based navigation strategy:
import 'router.dart' as router;

void main() => runApp(MyApp());

class MyApp extends StatelessWidget {
  // This widget is the root of your application.
  @override
  Widget build(BuildContext context) {
    return MaterialApp(
      ...
      onGenerateRoute: router.generateRoute,
      initialRoute: '/',
    );
  }
}
You'll notice that I imported router.dart as first thing, and then set onGenerateRoute property of MaterialApp to re-route to given page. Don't forget to provide initialRoute attribute. This attribute dictates which page will be opened as first thing after app launch.
User and FlutterFacts bot interaction is implemented in FlutterFactsDialogFlow() class. Let's checkout the details in next section.
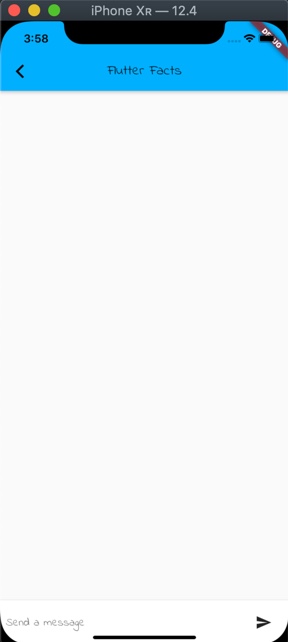
Developing "FlutterFactsDialogFlow" interface
In this section, I'll be building a simple chat window looking interface to interact with 'FlutterFactsBot'. Interface will have following components in addition to AppBar:
- User input box at the bottom
- Top part to show interaction log between user and 'FlutterFactsBot'
- User and 'FlutterFactsBot' icons
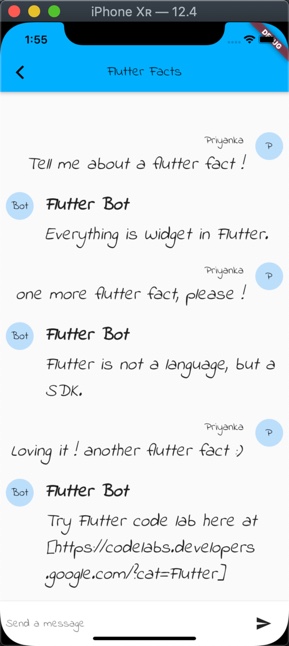
FlutterFactsBot in Action !*
This is how user and FlutterFactsBot interaction log would like:
Let's dive in coding the interface now!
Show me the code:
When user clicks on the chat icon, it'll launch FlutterFactsDialogFlow page, which is StatefulWidget. This widget will have a list of fact messages _messages to display the interaction log of conversation between user and FlutterFactsBot. This list will be displayed in reverse order, that means most recent messages will be at the bottom.
Page has two parts: appBar & body. AppBar has title for the page whereas body part has three widgets inside a Column widget. Flexible widget contains a ListView to show _messages list in reverse order. Divider widget is used to give a visual separation between interaction log and text box _queryInputWidget to input user's query.
class FlutterFactsDialogFlow extends StatefulWidget {
  FlutterFactsDialogFlow({Key key, this.title}) : super(key: key);

  final String title;

  @override
  _FlutterFactsDialogFlowState createState() => new _FlutterFactsDialogFlowState();
}

class _FlutterFactsDialogFlowState extends State<FlutterFactsDialogFlow> {
  final List<FactsMessage> _messages = <FactsMessage>[];

  ...

  @override
  Widget build(BuildContext context) {
    return Scaffold(
      appBar: AppBar(
        centerTitle: true,
        title: Text("Flutter Facts"),
      ),
      body: Column(children: <Widget>[
        Flexible(
            child: ListView.builder(
              padding: EdgeInsets.all(8.0),
              reverse: true, //To keep the latest messages at the bottom
              itemBuilder: (_, int index) => _messages[index],
              itemCount: _messages.length,
            )),
        Divider(height: 1.0),
        Container(
          decoration: new BoxDecoration(color: Theme.of(context).cardColor),
          child: _queryInputWidget(context),
        ),
      ]),
    );
  }
}
Let's explore _queryInputWidget widget for entering user's query text. This is the area where user can enter their query text. It has two parts to it: TextField widget to enter query text, and IconButton for submitting query. TextField widget needs a controller and onSubmitted attributes. onSubmitted attribute calls the given method _submitQuery in our case, once user is done entering the text and hits enter. IconButton widget is another way to submit text to DialogFlow. It's onPressed calls _submitQuery as well.
class _FlutterFactsDialogFlowState extends State<FlutterFactsDialogFlow> {
  final TextEditingController _textController = new TextEditingController();

  Widget _queryInputWidget(BuildContext context) {
    return Container(
      child: Container(
        margin: EdgeInsets.symmetric(horizontal: 8.0, vertical: 8.0),
        child: Row(
          children: <Widget>[
            Flexible(
              child: TextField(
                controller: _textController,
                onSubmitted: _submitQuery,
                decoration: InputDecoration.collapsed(hintText: "Send a message"),
              ),
            ),
            Container(
              margin: EdgeInsets.symmetric(horizontal: 4.0),
              child: IconButton(
                  icon: Icon(Icons.send),
                  onPressed: () => _submitQuery(_textController.text)),
            ),
          ],
        ),
      ),
    );
  }

...

}
Let's take a look what _submitQuery does when user is done entering their query about Flutter.
As you see in code below, when _submitQuery is called, first thing it does is to clear the input TextField to make it ready for the next user interaction. It takes the TextField text and creates a data structure FactsMessage to display interaction log. You might notice few things here. _submitQuery takes input as text. When _submitQuery is called from TextField widget, text is being passed to this method implicitly. Whereas when _submitQuery is called from IconButton's onPressed method text is retrieved from _textController and passed into _submitQuery method.
void _submitQuery(String text) {
  _textController.clear();
  FactsMessage message = new FactsMessage(
    text: text,
    name: "Priyanka",
    type: true,
  );
  setState(() {
    _messages.insert(0, message);
  });
  _dialogFlowResponse(text);
}
FactsMessage's name property is Priyanka to represent the user (in this case, I have hard coded my name as user for demonstration purposes) who is interacting with Bot. You'll see this name property will change to Flutter Bot when FlutterMessage is being constructed in _dialogFlowResponse. FactsMessage's data structure uses name property to show who owns the message. FactsMessage is a StatelessWidget to display interaction message between user and so called 'FlutterFactsBot'.
It takes three parameters:
text: query / response Textname: who the text belongs totype: boolean.truefor user.falsemeans bot.
type parameter decides which message format to be rendered from userMessage or botMessage.
class FactsMessage extends StatelessWidget {
  FactsMessage({this.text, this.name, this.type});

  final String text;
  final String name;
  final bool type;

  ...

  @override
  Widget build(BuildContext context) {
    return new Container(
      margin: const EdgeInsets.symmetric(vertical: 10.0),
      child: new Row(
        crossAxisAlignment: CrossAxisAlignment.start,
        children: this.type ? userMessage(context) : botMessage(context),
      ),
    );
  }

}
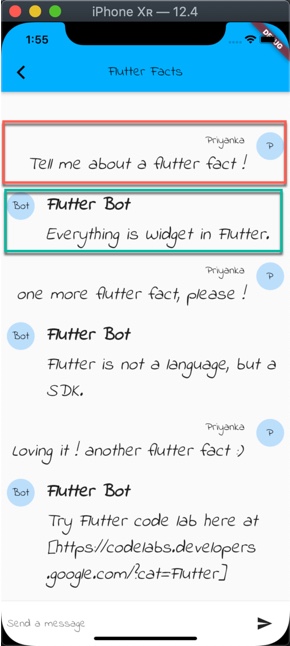
FactsMessage widget has two types of messages: userMessage and botMessage.
They differ in alignment of the widgets within a message row.
In screenshot below, userMessage is highlighted in red, and botMessage is highlighted in green.
Let's checkout userMessage widget's code below. It's List of widgets aligned to end of the screen. All user's messages will appear towards the left side of the screen, ending into CircleAvatar.
List<Widget> userMessage(context) {
  return <Widget>[
    Expanded(
      child: Column(
        crossAxisAlignment: CrossAxisAlignment.end,
        children: <Widget>[
          Text(this.name, style: Theme.of(context).textTheme.subhead),
          Container(
            margin: const EdgeInsets.only(top: 5.0),
            child: Text(text),
          ),
        ],
      ),
    ),
    Container(
      margin: const EdgeInsets.only(left: 16.0),
      child: CircleAvatar(child: new Text(this.name[0])),
    ),
  ];
}
FlutterFactsBot's messages will appear towards the right side of the screen, starting with the CircleAvatar
List<Widget> botMessage(context) {
  return <Widget>[
    Container(
      margin: const EdgeInsets.only(right: 16.0),
      child: CircleAvatar(child: Text('Bot')),
    ),
    Expanded(
      child: Column(
        crossAxisAlignment: CrossAxisAlignment.start,
        children: <Widget>[
          Text(this.name,
              style: TextStyle(fontWeight: FontWeight.bold)),
          Container(
            margin: const EdgeInsets.only(top: 5.0),
            child: Text(text),
          ),
        ],
      ),
    ),
  ];
}
Let's move on to the last piece of the puzzle: getting response from DialogFlow API and rendering it.
DialogFlow Response:
After submitting query and rendering user's message in interactionLog, query is submitted to DialogFlow and response is rendered right below the companion userMessage.
This is how query is submitted to DialogFlow API using flutter_dialogflow plug-in:
void _dialogFlowResponse(query) async {
  _textController.clear();
  AuthGoogle authGoogle =
  await AuthGoogle(fileJson: "assets/flutter-to-fly-creds.json").build();
  Dialogflow dialogFlow =
  Dialogflow(authGoogle: authGoogle, language: Language.english);
  AIResponse response = await dialogFlow.detectIntent(query);
  FactsMessage message = FactsMessage(
    text: response.getMessage() ??
         CardDialogflow(response.getListMessage()[0]).title,
    name: "Flutter Bot",
    type: false,
  );
  setState(() {
    _messages.insert(0, message);
  });
}
FactsMessage is constructed and added to _messages conversation log. Every time user enters a query text consisting of word 'flutter', pre-canned text responses will be returned from DialogFlow.
In this example, I've used very simple default text responses at DialogFlow for fulfillment. However, you can serve more dynamic content using Webhooks fulfillment.
You're Done :)
Keep Fluttering !
Source code
Source code is available here
[Update] Code has been tested on Flutter stable channel 1.12.13+hotfix.8, and Dart version Dart 2.7.0
[Update #2 - 04/20/20]
In case you're running into null response from DialogFlow, you may want to make sure that you've correct setup.
You can also try to create new credentials in google cloud with role as : Dialogflow ->Dialogflow api admin
References/Credits:
- Webhooks fulfillment
- DialogFlow
- Designing Cross platform Flutter prototype for Landing Page
- Making Cross-platform Flutter Landing Page Responsive
- Using Flutter Themes for Cross-platform Landing Page (Web-Hummingbird, Android, iOS)
Happy cooking with Flutter :)
Liked the article ? Couldn't find a topic of your interest ? Please leave comments or email me about topics you would like me to write ! BTW I love cupcakes and coffee both :)