Understanding Flutter PopupMenuButton Widget
Posted on July 19, 2019 in Flutter
Target Audience: Beginner
Recipe: Implementing "Settings" menu using PopupMenuButton widget in Stateless vs Stateful manner.
Focus Widget: PopupMenuButton Widget
Goal:
- Understanding the difference between Stateful vs Stateless PopupMenuButton widget implementations.
- "Settings" menu using PopupMenuButton to display four menu items : 'Home', 'Github', 'Videos' and 'Jobs'.
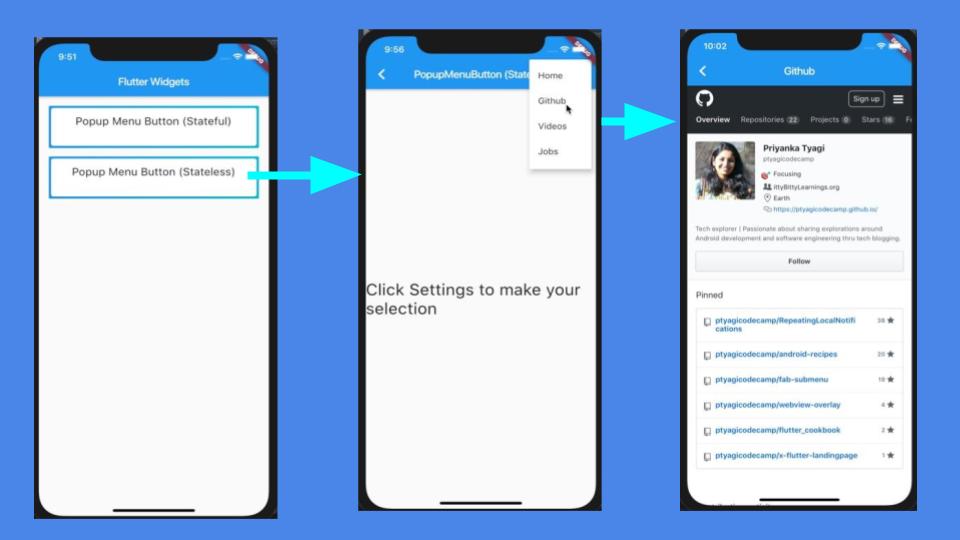
PopupMenuButton (Stateless) workflow:
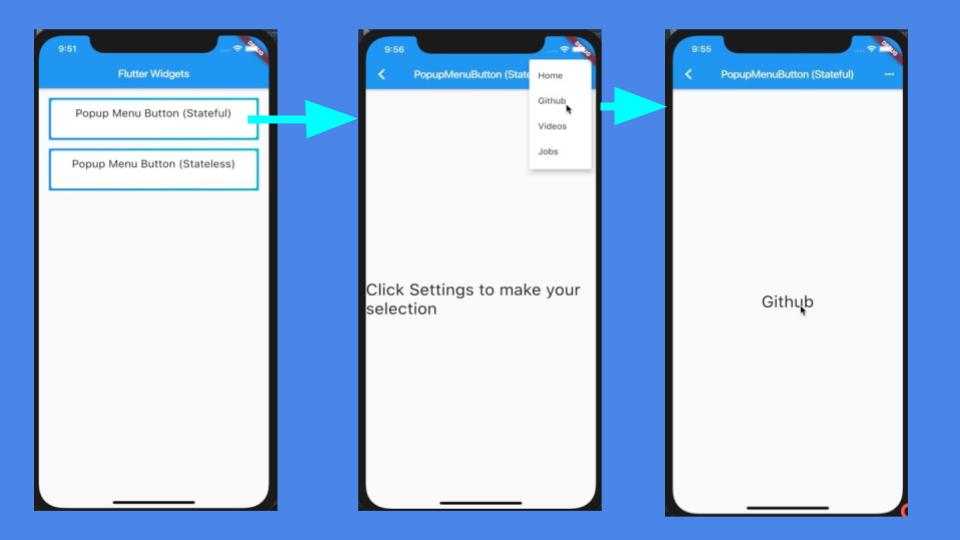
PopupMenuButton (Stateful) workflow:
Checkout the companion video tutorial:
In this recipe, I'll show you how to use PopupMenuButton widget as Stateless and Stateful widgets, and when to use one over another.
As we know that Stateless widgets are passed in to values/properties when they're initiated, and don't change thereafter. They are immutable and can't change their properties dynamically. For example, when a screen or page is created as a Stateless widget, it can't update properties or state of its children widgets.
For instance, when you're implementing a counter, and expect a button to update the number of times it's tapped on page's body (Text) widget, you may want to use Stateful widget rather a Stateless widget.
A good example of Stateless widget is RaisedButton. Certain properties are passed into RaisedButton when initializing, which remains unchanged during the lifecycle of the widget like color, size etc.
For demonstration purposes, I'll create two pages with Settings menu in AppBar. This Settings menu will have few pre-defined menu-items.
First page inherits Stateless widget. Selecting different options from Settings menu, would happily print value on the console, but wouldn't update any other widget on that given page. However, we can navigate to another page when a selection is made.
Second page inherits Stateful widget. Choosing an option from Settings menu will update the selection in body's Text widget of the same screen.
Let's go ahead and implement four menu items ('Home', 'Github', 'Videos' and 'Jobs') for "Settings" menu. In case you're not aware what Settings menu is referred in the Material design world: it's the three vertical dots in top-right corner of 'AppBar'. This page is simple.
It has three main widgets:
- AppBar: AppBar contains Settings vertical dotted icon.
- PopupMenuButton: Settings menu uses this widget to list all options.
- Body: Current choice is updated in body part in Text widget.
Expected behavior is that whenever a choice is selected in Settings menu, it gets printed page's body area. If "Github" option is selected, then "Github" should be printed in body. We'll also print this chosen selection on console/terminal to make sure that control is coming at the right place.
PopupMenuButton (Stateless)
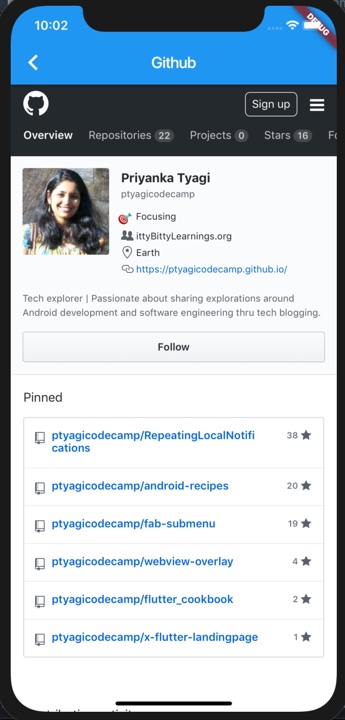
Choosing an option from Settings menu will open the selected link in WebView.
Choosing "Github" option from menu:

Github link opened in WebView:
This is how page for Stateless variation of PopupMenuButton would look like:
Widget build(BuildContext context) {
  return Scaffold(
    appBar: AppBar(
      title: Text('PopupMenuButton (Stateless)'),
      actions: <Widget>[
        PopupMenuButton(
          onSelected: (value) {
            //print the selected option
            print(value);

            //Update the current choice.
            //However, this choice won't be updated in body section since it's a Stateless widget.
            choice = value.toString();
          },
          itemBuilder: (BuildContext context) {
            return NavLinks.values.map((link) {
              return PopupMenuItem(
                value: link,
                child: Text(displayString(link)),
              );
            }).toList();
          },
        ),
      ],
    ),
    body: Center(
      child: Text(
        //Print the current choice
        choice,
        style: TextStyle(fontSize: 30),
      ),
    ),
  );
}
As I've mentioned above, choosing an option can be acknowledged that an option has been picked by printing current selection on console with help of print(value). In this case body's default text doesn't change. However, current selection is printed on terminal correctly. Basically, this(Stateless) type of widget is not capable of handling state of the widget and does justice to its name being Stateless :)
To make better sense for menu item selection. Let's open those links in a WebView.
onSelected: (value) {
            //print the selected option
            print(value);

            //Update the current choice.
            //However, this choice won't be updated in body section since it's a Stateless widget.
            choice = displayString(value);

            Navigator.pushNamed(context, WEBVIEW,
                arguments: WebViewArguments(
                    title: displayString(value), url: linkUrl(value)));
          }
WEBVIEW tells system how to find WebView page. Checkout the router.dart to get better understanding of navigation and routing.
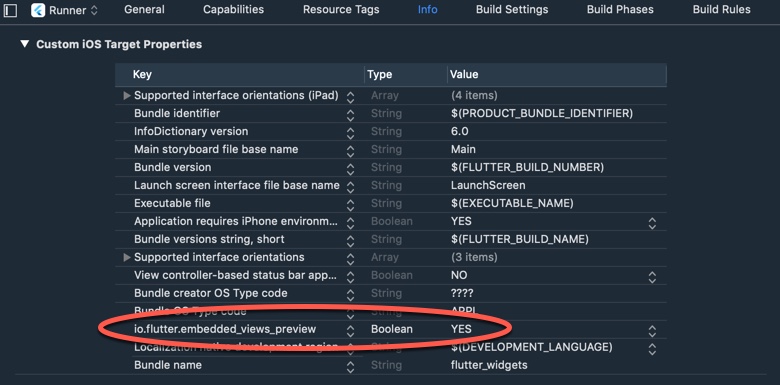
Note: To open WebView for iOS, you would need to add key io.flutter.embedded_views_preview and value YES in Info.plist.
Now, let's move on to observe Stateful widget's behavior.
PopupMenuButton (Stateful)
Choosing an option from Settings menu will update the Text widget in body of the page.
Choosing "Github" option from menu:
Displaying selected option Text widget:
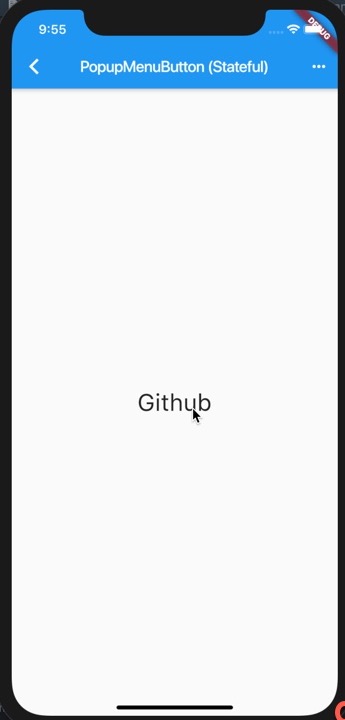
This is how page for Stateful variation of PopupMenuButton would look like:
class PopupMenuButtonWidgetStateFul extends StatefulWidget {
  @override
  State<StatefulWidget> createState() => _PopupMenuButtonWidgetState();
}

class _PopupMenuButtonWidgetState extends State {
  String choice = "Click Settings to make your selection";

  @override
  Widget build(BuildContext context) {
    return Scaffold(
      appBar: AppBar(
        title: Text('PopupMenuButton (Stateful)'),
        actions: <Widget>[
          PopupMenuButton(
            onSelected: (NavLinks value) {
              setState(() {
                //print the selected option
                print(value);

                //Update the current choice.
                choice = displayString(value);
              });
            },
            itemBuilder: (BuildContext context) {
              return NavLinks.values.map((link) {
                return PopupMenuItem(
                  value: link,
                  child: Text(displayString(link)),
                );
              }).toList();
            },
          ),
        ],
      ),
      body: Center(
        child: Text(choice, style: TextStyle(fontSize: 30),),
      ),
    );
  }
}
Notice the setState() method. All Stateful widgets implement createState() and define a state of the widget that it could be in at a given point of time. A child widget doesn't get updated unless it's being updated inside setState(). You may notice that I'm updating the current selection in setState() method as well.
Note: displayString(NavLinks link) and String linkUrl(NavLinks link) are convenience methods.
Conclusion
In nutshell, you may want to use Stateful widgets when you want parts of the screen or children widgets to update their values/properties.
Stateless widgets are immutable. They can be used in cases where properties of widgets don't need to be updated frequently, and/or to implement page navigation as we did in above example for navigating to WebView pages for chosen menu item url.
Source code repo:
- Native Apps (Android / iOS) recipe source code is available here
- Web Apps (Hummingbird) recipe source code is available here
References:
- Hummingbird PopupMenuButton
- PopupMenuButton Widget
- WebView for Flutter
- Stateless Vs Stateful widgets
Happy cooking with Flutter :)
Liked the article ? Couldn't find a topic of your interest ? Please leave comments or email me about topics you would like me to write ! BTW I love cupcakes and coffee both :)
Follow me at twitter