Implementing Voice input for Search action in AppBar
Posted on October 10, 2019 in Flutter
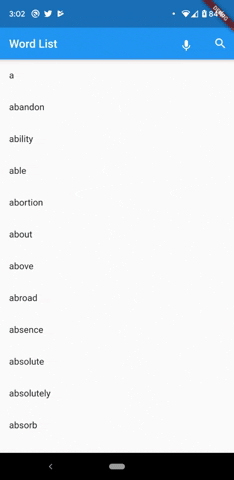
Voice Search in AppBar
This recipe is second part of Implementing Search action in AppBar tutorial. Today, we'll use our voice to enter the search term rather typing text in search bar.
Target Audience: Beginner
Recipe: Implementing Voice input for Search action in AppBar using Flutter for Android and iOS mobile apps.
Focus Flutter plugin: SpeechRecognition
Goal: In this recipe, I'll go over following items:
- Adding a mic icon in SearchBar
- Handling permissions: Using permission_handler plugin to request audio permissions from user at Android and iOS platforms.
- Integrating speech recognition using SpeechRecognition Flutter plugin
Checkout in action:
Lets's get started!
Dependencies: pubspec.yaml
We'll need two new dependencies:
-
SpeechRecognition Plugin is needed to capture the voice input from user and convert it into text/transcript. This transcript is used to run search in word list and display the result.
-
Permission Handler Plugin is needed to ask for platform specific permissions required to capture voice input.
dependencies:
  speech_recognition: ^0.3.0+1
  permission_handler: ^3.2.0
Adding mic icon in SearchBar
Mic icon in search bar:
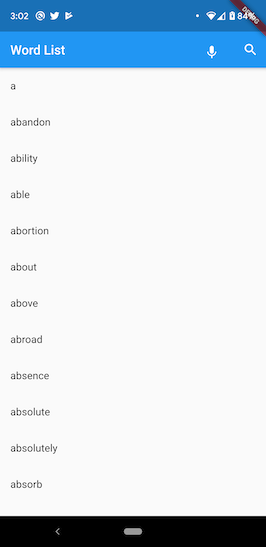
First, we'll add a microphone icon in AppBar's actions. Please note the new code _buildVoiceInput(..) responsible for accepting voice input. Refer to previous article for other details.
@override
  Widget build(BuildContext context) {
    return Scaffold(
      appBar: AppBar(
        automaticallyImplyLeading: false,
        title: Text('Word List'),
        actions: <Widget>[
          _buildVoiceInput(
            onPressed: _speechRecognitionAvailable && !_isListening
                ? () => start()
                : () => stop(),
            label: _isListening ? 'Listening...' : '',
          ),
          //Adding the search widget in AppBar
          IconButton(
            tooltip: 'Search',
            icon: const Icon(Icons.search),
            //Don't block the main thread
            onPressed: () {
              showSearchPage(context, _searchDelegate, transcription);
            },
          ),
        ],
      ),
      ...
   }

   Widget _buildVoiceInput({String label, VoidCallback onPressed}) =>
    new Padding(
        padding: const EdgeInsets.all(12.0),
        child: Row(
          children: <Widget>[
            FlatButton(
              child: Text(
                label,
                style: const TextStyle(color: Colors.white),
              ),
            ),
            IconButton(
              icon: Icon(Icons.mic),
              onPressed: onPressed,
            ),
          ],
        ));
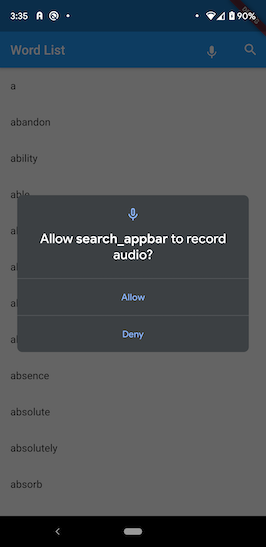
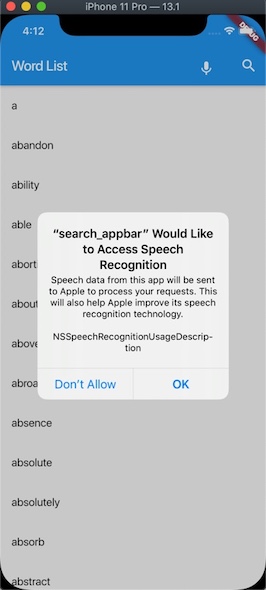
Handling permissions
Android and iOS platforms need user's consent to capture voice input. permission_handler plugin helps to request audio permissions from user at both platforms.
It shows user that voice recording permissions are required, and present a permissions dialog like below:
Android:
iOS:
Android:
Make sure that you've following permissions in AndroidManifest.xml:
<uses-permission android:name="android.permission.INTERNET"/>
  <uses-permission android:name="android.permission.RECORD_AUDIO" />
iOS:
Add following keys in Info.plist. Feel free to modify text description accordingly.
-
Key:
Privacy - Microphone Usage Description. Value:This application needs to access your microphone. -
Key:
Privacy- Speech Recognition Usage Description. Value:This application needs the speech recognition permission.
Once AndroidManifest.xml and Info.plist in place, next step is to ask for permissions from Flutter app, main.dart in our case like below:
void requestPermission() async {
  PermissionStatus permission = await PermissionHandler()
      .checkPermissionStatus(PermissionGroup.microphone);

  if (permission != PermissionStatus.granted) {
    await PermissionHandler()
        .requestPermissions([PermissionGroup.microphone]);
  }
}
Integrating SpeechRecognition
I'll be using SpeechRecognition Flutter plugin to integrate capture voice input for search term.
Speech recognizer related code needs to go inside a Stateful widget. In our case, it goes under _SearchAppBarRecipeState. _speech holds the reference to SpeechRecognition instance. _speechRecognitionAvailable flag gets updated based on availability of speech recognizer. _isListening is set to true when app is activated to listen to user input. Lastly, transcription is voice input transcribed int text. This is the text that will be used to run search against.
class _SearchAppBarRecipeState extends State<SeachAppBarRecipe> {
  //speech
  SpeechRecognition _speech;
  bool _speechRecognitionAvailable = false;
  bool _isListening = false;

  String transcription = '';
  ...
}
Initializing SpeechRecognizer in initState() method:
@override
void initState() {
  ...
  activateSpeechRecognizer();
}
Speech recognizer is activated with callbacks. Few of the important callbacks are:
-
onSpeechAvailability(bool result): It updates the status of the availability of speech in_speechRecognitionAvailableflag. -
onCurrentLocale(String locale): Updates the SpeechRecognizer's locale for the language that it is expected to be listening to. -
onRecognitionStarted(): It's called when SpeechRecognizer has been listening to user voice input actively. It updates_isListeningflag totrue. -
onRecognitionResult(String text): This is where the actual magic happens. Voice input is transcribed to English text. We're using only 'en_US' locale for this code recipe. Once the transcribed text is available, it's sent over to search page like below:
showSearchPage(context, _searchDelegate, transcription);
Transcribed text gets populated in search bar. When user accepts the search word by hitting enter, search result is displayed on result page similar to how it was displayed in previous tutorial.
onRecognitionComplete(): This callback is called when user stops talking. At this point,_isListeningflag is set tofalse.
void activateSpeechRecognizer() {
  requestPermission();

  _speech = new SpeechRecognition();
  _speech.setAvailabilityHandler(onSpeechAvailability);
  _speech.setCurrentLocaleHandler(onCurrentLocale);
  _speech.setRecognitionStartedHandler(onRecognitionStarted);
  _speech.setRecognitionResultHandler(onRecognitionResult);
  _speech.setRecognitionCompleteHandler(onRecognitionComplete);
  _speech
      .activate()
      .then((res) => setState(() => _speechRecognitionAvailable = res));
}

void start() => _speech
    .listen(locale: 'en_US')
    .then((result) => print('Started listening => result $result'));

void cancel() =>
    _speech.cancel().then((result) => setState(() => _isListening = result));

void stop() => _speech.stop().then((result) {
      setState(() => _isListening = result);
    });

void onSpeechAvailability(bool result) =>
    setState(() => _speechRecognitionAvailable = result);

void onCurrentLocale(String locale) =>
    setState(() => print("current locale: $locale"));

void onRecognitionStarted() => setState(() => _isListening = true);

void onRecognitionResult(String text) {
  setState(() {
    transcription = text;
    showSearchPage(context, _searchDelegate, transcription);
    stop(); //stop listening now
  });
}

void onRecognitionComplete() => setState(() => _isListening = false);
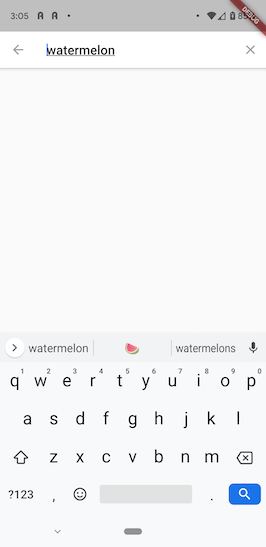
Listening to user's voice:

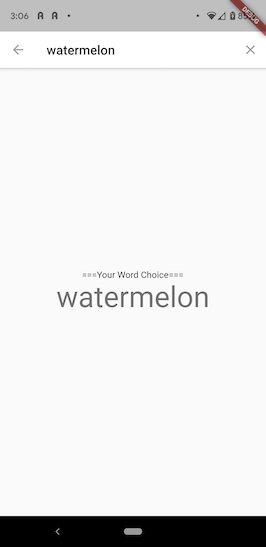
Converting speech to text, and using text for searching in word list:
Displaying result:
Source code repo: Recipe source code is available here
References:
Happy cooking with Flutter :)
Liked the article ? Couldn't find a topic of your interest ? Please leave comments or email me about topics you would like me to write ! BTW I love cupcakes and coffee both :)