Implementing Slider & RangeSlider Flutter Widgets
Posted on November 09, 2019 in Flutter
Introduction
Slider & RangeSlider widgets are used to select a value (Slider widget) or a range of values (RangeSlider widget) from a range of values.
In this code recipe, I'll demonstrate usage of both of these widget with help of scenario that is common to elementary school teachers. In the beginning of the school year, most of the language teachers curate a word list appropriate for the Grade and based on difficulty level of the words.
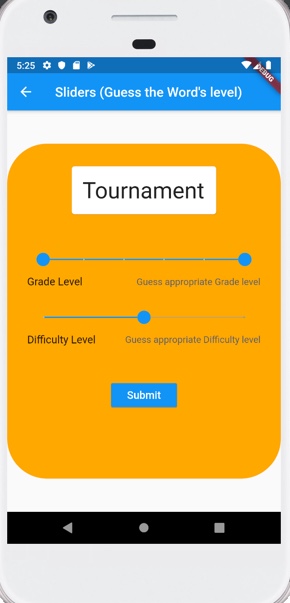
In today's code recipe, we'll make a Flutter app that'll display a random word from a given list of words. Teacher / user can choose the appropriate range of grades, and difficulty level for the given grade range. We'll make use of RangeSlider widget to select the Grade level ranges (from zero or Kindergarten to 5th grade), and Slider widget to choose difficulty level (three levels 1, 2, 3 represent Easy, Moderate and Advanced difficulty levels).
Target Audience: Beginner
Recipe: Implement RangeSlider and Slider widget to select Grade ranges and difficulty levels for the given words.
Focus Flutter plugin:
Goal: In this recipe, I'll go over following items:
- Display a random English word from the given sample word list.
- RangeSlider widget to represent the grades from 0 (K) to 5th.
- Slider widget to represent three difficulty levels: Easy (1), Moderate (2), and Advanced (3).
- Submit button for show the flow of app. Clicking on Submit button will rest the interface, and a word will be picked randomly from the sample wordlist.
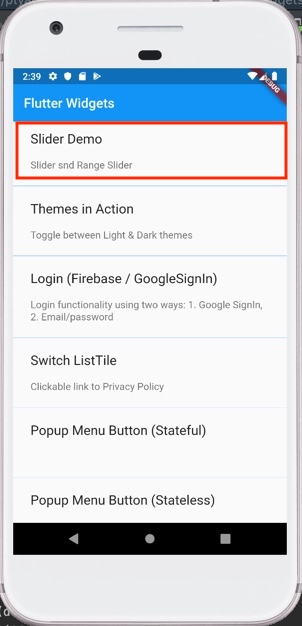
This recipe is part of collection of my other code recipes. Starting page for recipes look like below:
Checkout YouTube video:
1. Displaying word for rating
Display a random English word from the given sample word list. I'm using a simple list of English words. In production application, this list either be stored in cache locally or streaming from backend depending your use case.
This is how it looks like in code recipe:
  var listOfWords = [
    'Them',
    'Up',
    'Web',
    'Come',
    'Play',
    'They',
    'So',
    'Construct',
    'Tournament',
    'Glide'
  ];

  var word = 'Their';
word variable keeps the currently displayed word ready for rating.
Showing current word inside Card widget:
Center(
  child: Card(
    elevation: 1.0,
    child: Padding(
      padding: const EdgeInsets.all(16.0),
      child: Text(
        word,
        style: TextStyle(
            fontSize: 34.0, fontWeight: FontWeight.normal),
      ),
    ),
  ),
),
Once Submit button is called, it'll be randomly picked from listOfWords and updated.
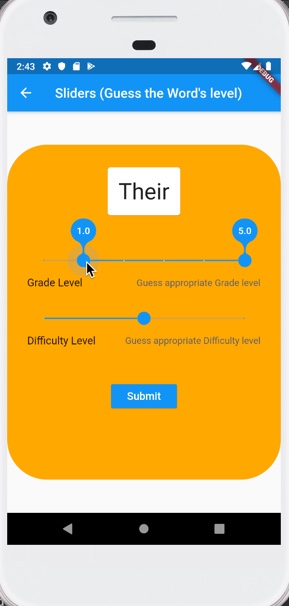
2. Implementing RangeSlider widget
RangeSlider widget to represent the grades from 0 (K) to 5th.
Remember that widget's values can only be updated for Stateful widget.
I chose RangeSlider to represent different grades because, one word can be appropriate for a multiple grades. However, difficulty might vary from one grade to another.
For example word 'Their' can be appropriate for grade 2nd thru 5th. However, difficulty level for 2nd grade can be 'Advanced', and 'Easy' for 5th grade. That's the reason range selection makes sense for grades whereas difficulty can be represented with one of the number from three possibilities: 1 (Easy), 2 (Moderate), or 3 (Advanced).
Since we're representing grades K thru 5 in numbers : 0, 1, 2, 3, 4, and 5, min for RangeSlider is 0 and max is 5. We want discrete selection of grades, so we'll use divisions attribute. That means there 2.5 can not be selected for a grade.
labels property displays the range of selection. RangeLabels is required to display labels for RangeSlider. It requires the start and end values of the range: RangeLabels('${gradesRange.start}', '${gradesRange.end}').
class SliderDemo extends StatefulWidget {
  @override
  _SliderDemoState createState() => _SliderDemoState();
}

class _SliderDemoState extends State<SliderDemo> {
  var gradesRange = RangeValues(0, 5);

  Widget build(BuildContext context) {
    return Scaffold(
      appBar: AppBar(
        title: Text("Sliders (Guess the Word's level)"),
      ),
      body: Stack(
        children: <Widget>[
        ...,
        RangeSlider(
          min: 0,
          max: 5,
          divisions: 5,
          labels: RangeLabels(
              '${gradesRange.start}', '${gradesRange.end}'),
          values: gradesRange,
          onChanged: (RangeValues value) {
            setState(() {
              gradesRange = value;
            });
          },
        ),
        ...,
        ],
        ),
  }

}
}
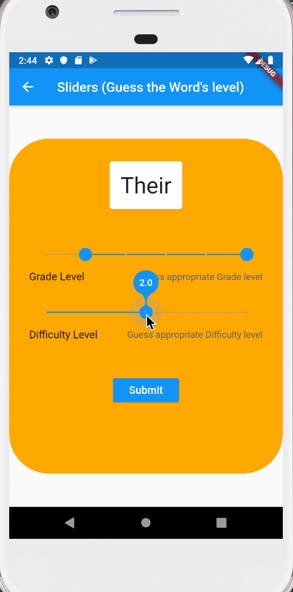
3. Implementing Slider widget
Slider widget to represent three difficulty levels: Easy (1), Moderate (2), and Advanced (3).
Slider widget expects values in double. I'm using 2 (Moderate) as default difficulty level for a chosen word. Since there are only three possible values for difficulty, min is set to 1, and max is 3. Similar to grades range, we want difficulty levels discrete as well. A word can fall in one of the 3 categories. We get two divisions by setting divisions property to 2. Setting label property to current selected value makes it informative for the user to make their selection.
Please note that I'm using Slider.adaptive widget. This widget adapts to the target platform.
class SliderDemo extends StatefulWidget {
  @override
  _SliderDemoState createState() => _SliderDemoState();
}

class _SliderDemoState extends State<SliderDemo> {
  double _diffLevel = 2;

  Widget build(BuildContext context) {
    return Scaffold(
      appBar: AppBar(
        title: Text("Sliders (Guess the Word's level)"),
      ),
      body: Stack(
        children: <Widget>[
        ...,
        Slider.adaptive(
          value: _diffLevel.toDouble(),
          onChanged: (double newValue) {
            setState(() {
              _diffLevel = newValue;
            });
          },
          min: 1,
          max: 3,
          divisions: 2,
          label: _diffLevel.toString(),
        ),
        ...,
        ],
        ),
  }
}
}
4. Submit button (Resetting interface)
I added Submit button for completeness of workflow of page. Clicking on Submit button will rest the interface, and a word will be picked randomly from the sample wordlist.
Here's what happens when user clicks Submit button:
child: RaisedButton(
  ...
  child: Text(
    "Submit",
    style: TextStyle(fontSize: 16.0),
  ),
  onPressed: () {
    setState(() {
      var randomNumber = new Random().nextInt(9);
      word = listOfWords[randomNumber];
      _diffLevel = 2;
      gradesRange = RangeValues(0, 5);
    });
  },
),
Note: Interface's values are being reset inside setState(..) function.
Source code repo
Recipe source code is available here
References:
Happy cooking with Flutter :)
Liked the article ? Couldn't find a topic of your interest ? Please leave comments or email me about topics you would like me to write ! BTW I love cupcakes and coffee both :)