Flavoring Flutter Applications (Android & iOS)
Posted on March 20, 2021 in publishing-apps
Target Audience: Beginner
Recipe: Publish Flutter application on Android and iOS platforms for development(dev) and production (prod) environments.
Checkout the companion video tutorial:
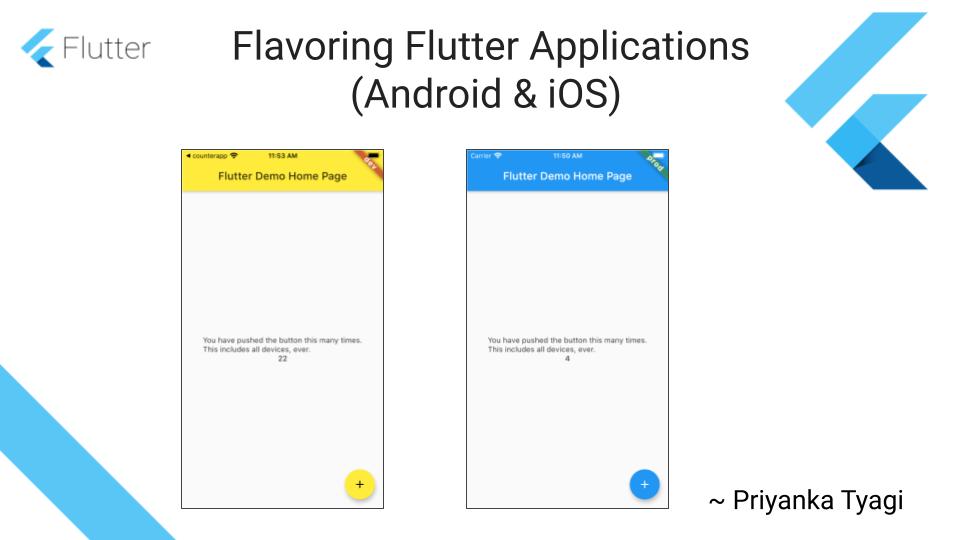
In this article, I will give overview of the process of publishing Flutter applications on Android and iOS platforms in multiple environments. In real-world applications development process, there are multiple environments and/or stages an applications is released in. During development stage, you may want to share your app to internal testers with a backend configured for development but not ready for production purpose. If you want to distribute your app to internal testers, you need a dev variant for the application.
When you are ready to roll-out the application for public release and have production backend ready, you need a variant of same app which is connected to the production backend. Let's call this variant of app as prod flavor.
Pre-requisites
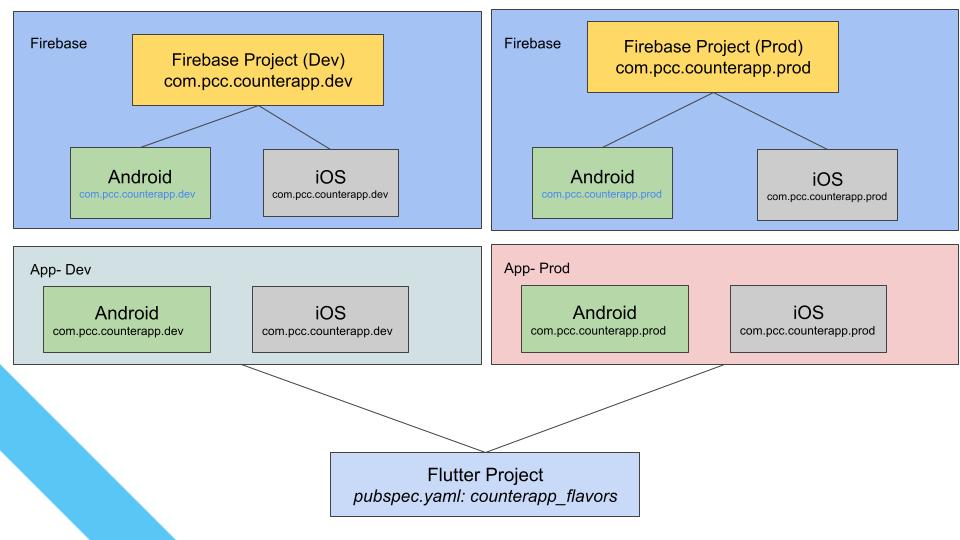
In this article, I will use default CounterApp in two variants or flavors: dev for development, and prod for production. Let's assume this app uses Firebase for backend. The dev flavor/variant of app uses one instance of Firebase project, and prod flavor uses different instance of Firebase project.
Flutter App Setup
AppConfig
Create a class AppConfig to encapsulate the app's environment/flavor type and specific name for that flavor.
class AppConfig {
  final String appName;
  final String flavor;

  AppConfig({@required this.appName, @required this.flavor});
}
Entry point for dev flavor
Create a file lib/main_dev.dart to run app in dev flavor. This is where you assign the flavor type and specific name for App based on that flavor.
void main() async {
  AppConfig devAppConfig = AppConfig(appName: 'CounterApp Dev', flavor: 'dev');
  Widget app = await initializeApp(devAppConfig);
  runApp(app);
}
Entry point for prod flavor
Create a file lib/main_prod.dart to run app in prod flavor. This is where you assign the flavor type and specific name for App based on that flavor.
void main() async {
  AppConfig devAppConfig =
      AppConfig(appName: 'CounterApp Prod', flavor: 'prod');
  Widget app = await initializeApp(devAppConfig);
  runApp(app);
}
Android
Let's configure environment variants (a.k.a Flavors) at Android platform. At this point you should have two Firebase projects setup dedicated for dev and prod environment/flavor each.
Firebase Configuration Files
First step is to download google-services.json file(s) from each Firebase project to a temporary location at your machine. Next, create two folders android/app/src/dev and android/app/src/prod for each flavor. The Firebase configuration files go under their flavor folders under android/app/src/ folder..Copy the respective google-services.json files into their flavor folders respectively.
* dev flavor: android/app/src/dev/google-services.json
* prod flavor: android/app/src/prod/google-services.json
Setup Flavors
Next step is to define flavors in app/build.gradle file as shown below.
android {


    defaultConfig {
        applicationId "com.pcc.counterapp"
        minSdkVersion 16
        targetSdkVersion 30
        versionCode flutterVersionCode.toInteger()
        versionName flutterVersionName
    }

    ...

    flavorDimensions "counterapp"

    productFlavors {
        dev {
            dimension "counterapp"
            applicationIdSuffix ".dev"
            resValue "string", "app_name", "Counter App Dev"
            versionNameSuffix ".dev"
        }
        prod {
            dimension "counterapp"
            applicationIdSuffix ".prod"
            resValue "string", "app_name", "Counter App Prod"
            versionNameSuffix ".prod"
        }
    }
}
That is all you need to enable flavors on Android side.
iOS
Let's create dev and prod environments(a.k.a Schemes) at iOS platform. We need to setup custom schemes at iOS side to support multiple variants.
Firebase Configuration files
- Copy GooglePlayServices files under
config/devandconfig/prod. - Copy the
configfolder into the Xcode (drag and drop under Runner project) - Targets -> Runner -> Build Phase: Add script to copy correct GooglePlaySerivce file for the correct scheme.
Move the script right after
Link Binary with Librariesitem.
environment="default"

# Regex to extract the scheme name from the Build Configuration
# We have named our Build Configurations as Debug-dev, Debug-prod etc.
# Here, dev and prod are the scheme names. This kind of naming is required by Flutter for flavors to work.
# We are using the $CONFIGURATION variable available in the XCode build environment to extract
# the environment (or flavor)
# For eg.
# If CONFIGURATION="Debug-prod", then environment will get set to "prod".
if [[ $CONFIGURATION =~ -([^-]*)$ ]]; then
environment=${BASH_REMATCH[1]}
fi

echo $environment

# Name and path of the resource we're copying
GOOGLESERVICE_INFO_PLIST=GoogleService-Info.plist
GOOGLESERVICE_INFO_FILE=${PROJECT_DIR}/config/${environment}/${GOOGLESERVICE_INFO_PLIST}

# Make sure GoogleService-Info.plist exists
echo "Looking for ${GOOGLESERVICE_INFO_PLIST} in ${GOOGLESERVICE_INFO_FILE}"
if [ ! -f $GOOGLESERVICE_INFO_FILE ]
then
echo "No GoogleService-Info.plist found. Please ensure it's in the proper directory."
exit 1
fi

# Get a reference to the destination location for the GoogleService-Info.plist
# This is the default location where Firebase init code expects to find GoogleServices-Info.plist file
PLIST_DESTINATION=${BUILT_PRODUCTS_DIR}/${PRODUCT_NAME}.app
echo "Will copy ${GOOGLESERVICE_INFO_PLIST} to final destination: ${PLIST_DESTINATION}"

# Copy over the prod GoogleService-Info.plist for Release builds
cp "${GOOGLESERVICE_INFO_FILE}" "${PLIST_DESTINATION}"
Note: I borrowed this script from this great article.
Custom Schemes
You need to create two schemes for two different environments: dev & prod. Follow the directions below:
- Create Scheme: dev -> Create debug, release and profile configuration for this new scheme (Project Runner -> Configuration-> Duplicate debug, release and profile configs for dev scheme)
- Rename existing Runner default scheme to prod.
- Manage scheme -> Assign correct configuration to its corresponding scheme.
At this point, if you run flutter run -t lib/main_dev.dart --flavor dev in CLI, you will see information to complete the custom scheme. Finish the custom scheme setup as directed.
The Xcode project defines build configurations: Debug, Release, Profile
Flutter expects a build configuration named Debug-dev or similar.
Open Xcode to fix the problem:
  open ios/Runner.xcworkspace
1. Click on "Runner" in the project navigator.
2. Ensure the Runner PROJECT is selected, not the Runner TARGET.
3. Click the Editor->Add Configuration->Duplicate "Debug" Configuration.

   If this option is disabled, it is likely you have the target selected instead
   of the project; see:
   https://stackoverflow.com/questions/19842746/adding-a-build-configuration-in-xcode

   If you have created a completely custom set of build configurations,
   you can set the FLUTTER_BUILD_MODE=debug
   in the .xcconfig file for that configuration and run from Xcode.

4. If you are not using completely custom build configurations, name the newly created configuration debug.
Could not build the precompiled application for the device.
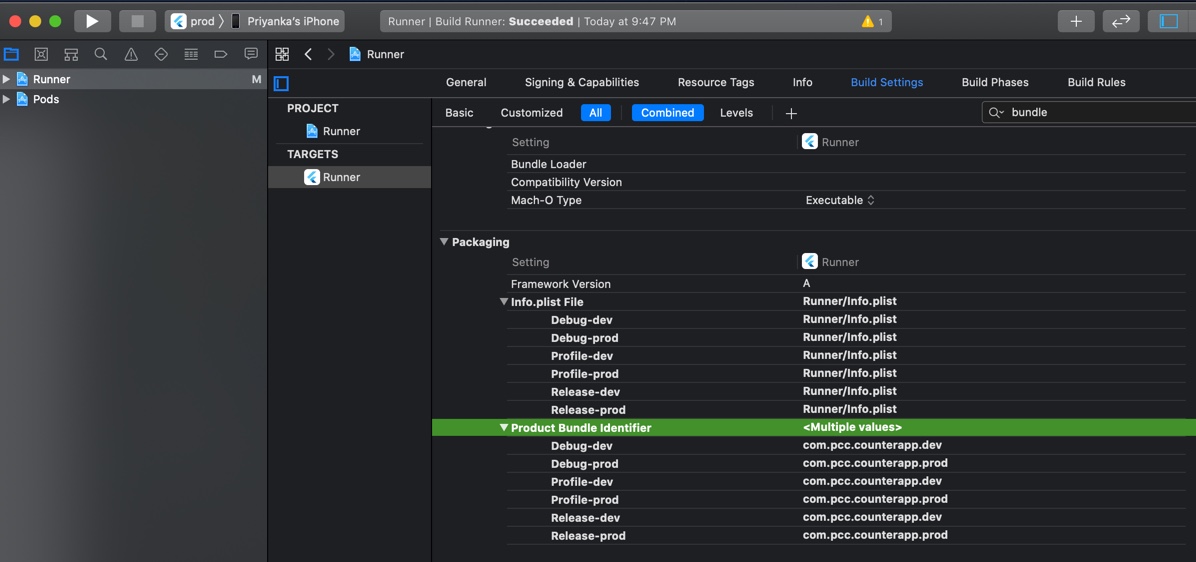
Scheme specific Product bundle identifier
Remember to assign correct bundle identifier for each scheme as described below.
- Targets -> Runner -> Build Settings -> Product Bundle Identifier Assign the correct bundle identifier for each item as shown in screenshot below.
Running App
I find following commands handy on CLI to run app for specific flavors:
#Run app in `dev` environment
flutter run -t lib/main_dev.dart  --flavor=dev

# Run app in debug mode (Picks up debug signing config)
flutter run -t lib/main_dev.dart  --debug --flavor=dev

# Run app in release mode (Picks up release signing config)
flutter run -t lib/main_dev.dart  --release --flavor=dev

# Create appBundle for Android platform. Runs in release mode by default.
flutter build appbundle -t lib/main_dev.dart  --flavor=dev

# Create APK for dev flavor. Runs in release mode by default.
flutter build apk -t lib/main_dev.dart  --flavor=dev
Replace dev with prod to run and build app for production environment.
Source Code Repo
- Recipe source code for this example is available here
References
- Flavoring Flutter
- Creating Flavors
- Build flavors in Flutter (Android and iOS) with different Firebase projects per flavor
Happy cooking with Flutter :)
Liked the article?Liked the article? Let me know with 👏👏👏
Couldn't find a topic of interest? Please leave comments or email me about topics you would like me to write ! BTW I love cupcakes and coffee both :)_